Support
 How to start a WordPress Blog (Step-by-Step Guide)
Looking to start a WordPress blog the right way?
We understand that starting a wordpress blog can be a horrifying thought especially when you are not tech savvy. You are definitely not alone. Having helped thousands of users start a wordpress blog, we have created one of the most comprehensive guides on how to start a WordPress blog without the need of having any technical understanding of the platform
The step-by-step process is pretty simple to follow, whether you are a teen or a 65 year old. However if you need any assistance, our expert support team will assist you with the wordpress blog setup for free.
What do you require to start a WordPress blog?
There are three pre-requisites to start a WordPress blog:
- An appealing idea for your domain name (this would be the name of your wordpress blog i.e something like serverfellows.com)
- A web hosting account (this is the place where your website or a blog will stay on the internet)
- Your complete attention for next 15 minutes.
Yes, you read that correctly. You can start a wordpress blog from scratch in less than 15 minutes. The step-by-step walk through below walk you through the entire process
In this tutorial, we will cover:
- How to Register a Domain Name
- How to Choose the Best WordPress Hosting Plan
- How to Install WordPress on your blog
- How to Change and customize Your WordPress Theme
- How to Write and Publish Your First Blog Post
- How to install Plugins to customize your WordPress Blog
- How to Monetize Your Blog
Step 1. Setting up
One of the the biggest and common mistakes newbie bloggers and businesses make when starting a blog is selecting the wrong blogging platform. It makes a lot of sense to use a self-hosted WordPress platform from WordPress.org . Why? Primarily Because
- It is free to use
- You can install third party wordpress plugins
- You can customize the design of your site
- Finally, you can make money from your website without any limitations or restrictions
Now you have most likely heard that WordPress as a platform is free to use. You must be thinking why it is out there for free and what is in it for WordPress. Honestly, there’s no catch per se. All you have to do is set it up and host it yourself. Basically, you need to buy your own domain name along with a web hosting plan.
A domain name is something that people type in the browser to get to your blog / site. It’s the address of your website on the internet. Think facebook.com or serverfellows.com. Web hosting is a place where your website stays. It’s your website’s home on the web. Every website or a self hosted wordpress blog needs web hosting.
A domain name costs around $14.95 / year, and a web hosting (depending on your requirements and billing cycle) starts from $6.95 / month at serverfellows. Hopefully, you understood everything you have read so far. If you need any assistance, do not hesitate to contact our support team
So let’s just go ahead and buy your domain + hosting.
Open up Serverfellows.com in a new tab and follow the instructions below:
Click on “SHARED HOSTING†as shown in the screenshot below. For better performance for wordpress, it is ideal to go for one of the wordpress hosting plans.
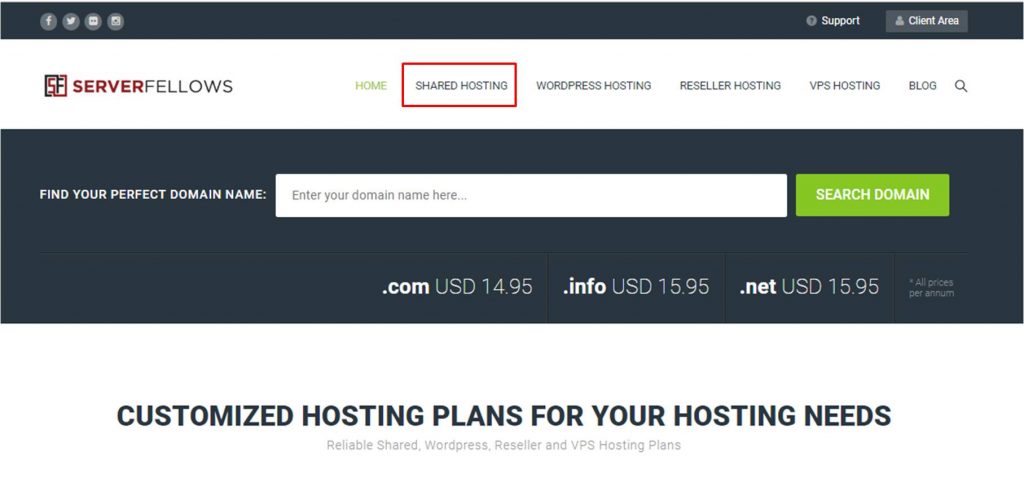
On the next screen, you will see all the plans listed. Select the plan that you require .
To check out which plan you need, check out this post on how to select the best wordpress hosting plan)

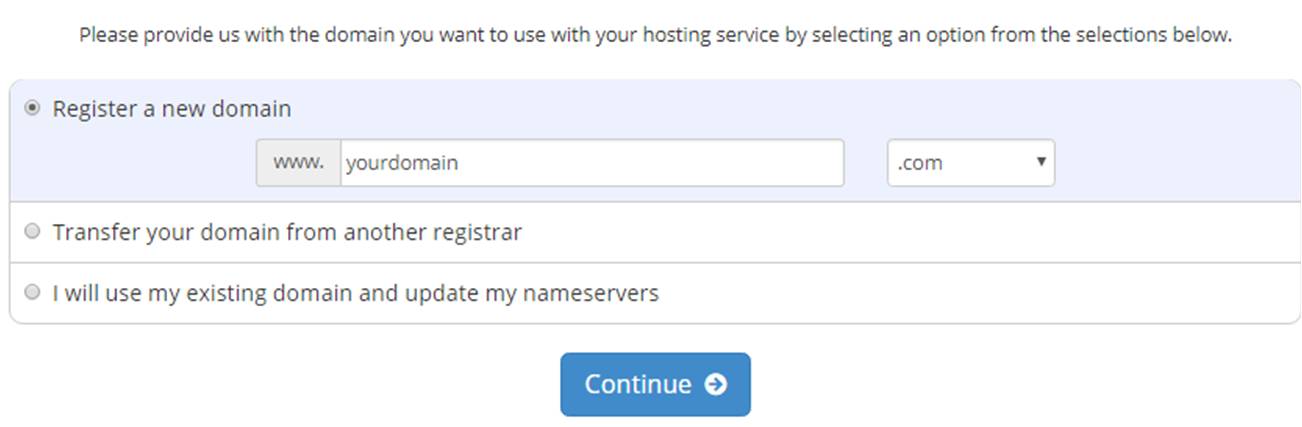
After that, you will be required to enter the domain name of your choice for your website.
Insert the preferred domain name and click on ‘CONTINUE’. You can choose another suggested domain name from the options displayed in case your domain name is not available for purchase.
It is preferable to use a domain with a .com extension as it is one of the most popular ones. If you already have purchased a domain from another registrant, you may continue with other available options
Choose the domain, select the billing cycle and click on CONTINUE
If you want to hide your identity and want privacy protection, you may choose the ID protection option below the domain (as can be seen in the screenshot below). It is very much recommended to add ‘Domain Privacy Protection’ in your package as it ensures that your personal details are always hidden, thereby protecting you from rowdy marketers and spammers.
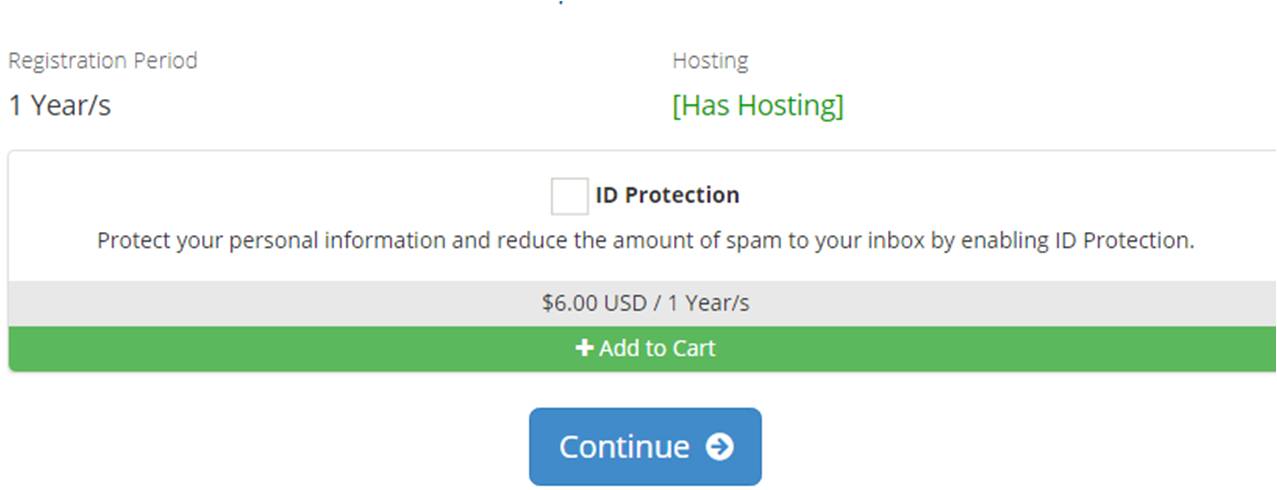
Once done, click on CONTINUE, and proceed to reviewing your order once
On this page, If you have a PROMOCODE , please enter the same to avail discount on Serverfellows hosting plans

On the next screen, you would need  to enter the account information in the required fields. Enter the appropriate details and continue with the next section.
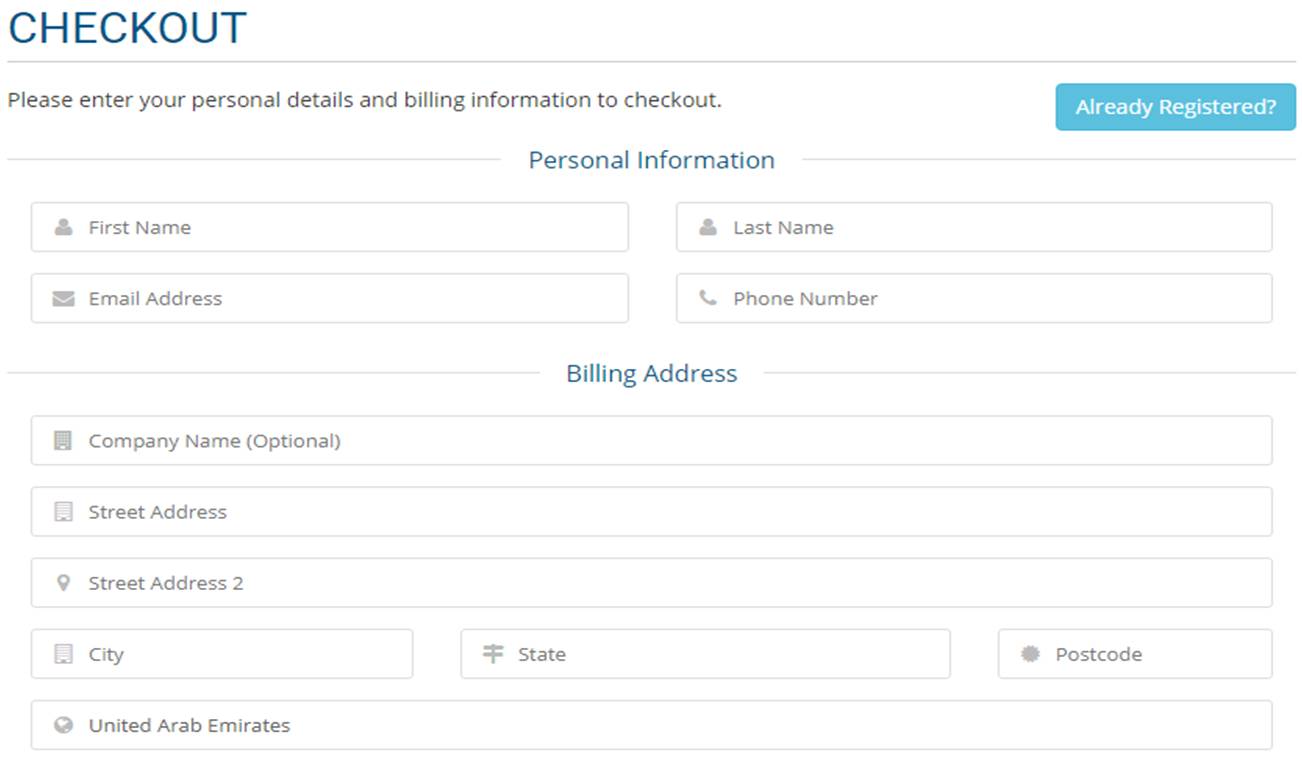
Next step would be  to enter the correct billing information. This is required inorder to make the payment for the web hosting service you purchased
Once the above instructions are followed, you will receive a welcome email along with account information email. The email will include the details on how to login to your web hosting cPANEL (control panel . All our plans come with a free cPANEL). This is the place from where you manage and administer everything from emails, support among other things. This is also the place from where you install WordPress.
Step 2. Install WordPress
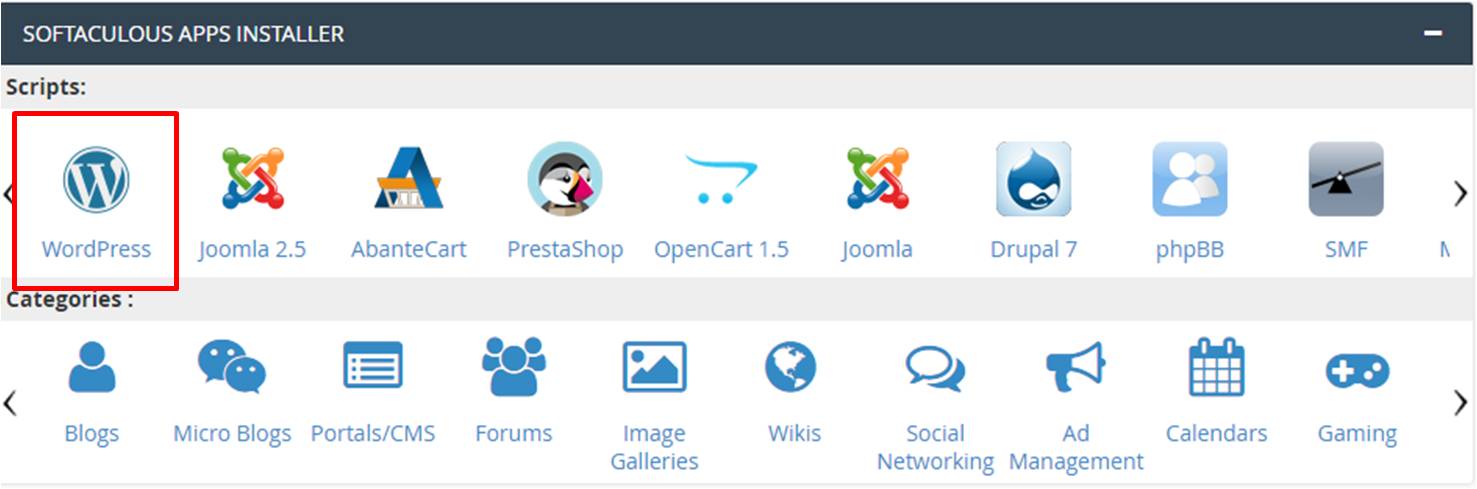
In the cPanel, things can get a bit overwhelming if you are not well versed with the platform. You will see a string of small icons which offer different services and features. You an safely ignore a chunk of them primarily since you are never likely to use them.
Just scroll down to the APPS INSTALLER section, you will see a WordPress Icon. Just click on the same.
You will be now be redirected to the Serverfellows Quick Install page for WordPress. Click on the INSTALL NOW button.
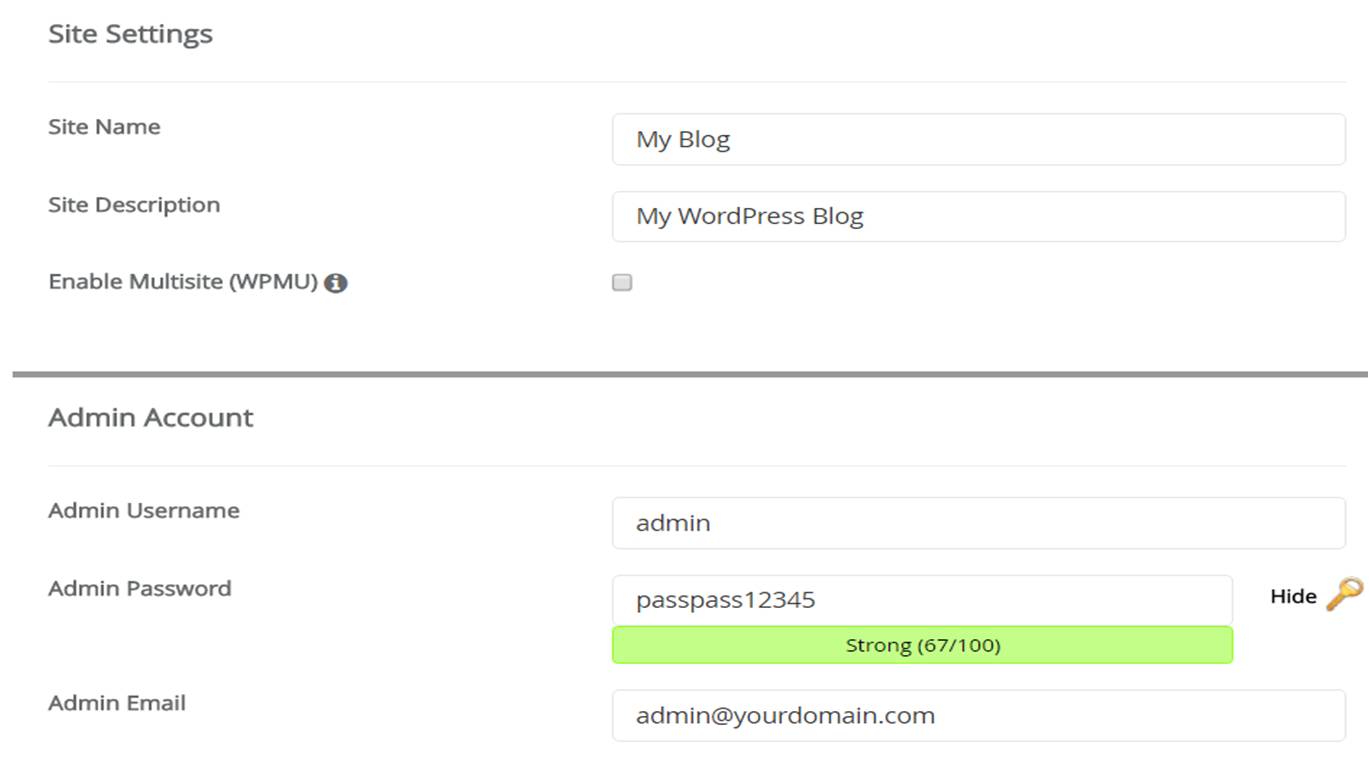
On the next page, you will be required to choose your domain name for which you want to start a wordpress blog for. Select the domain name from the dropdown given, enter the site name and description, add your username and password and finally click on INSTALL
There is an option to email installation instructions to yourself (or any other email ID you prefer).
That is all. The Installer will now begin installing WordPress.
Once WordPress installation is complete, you will see the success notice on the next screen(similar to the screenshot below)

You will also be able to see the details of your wordpress installation.
Well done, you have now successfully created your WordPress blog / website. That was easy right?
Your login URL will look something like this : http://yourdomain.com/wp-admin
Click on the WordPress login URL and login to your dashboard with the credentials you have.
We will now begin customization of your site’s appearance before we start blogging.
Step 3. Choosing  your WordPress Theme
Themes control the visual appearance the WordPress blog. When you initially visit your blog URL, it will appear to be something like this:
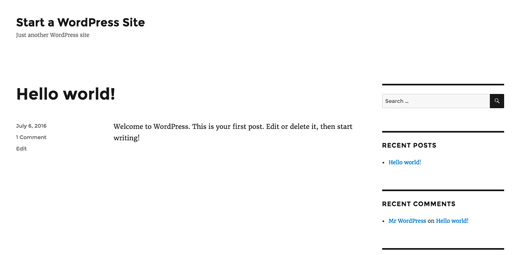
This is definitely not a very attractive look.
Customizing and modifying the look and feel of your wordpress blog is by far one of the most thrilling and gratifying part in the journey of starting your WordPress adventure.
There are tens of thousands of pre-developed WordPress themes that you can just install on your site with a click of a button. Some of them are free, while some of the premium ones are paid.
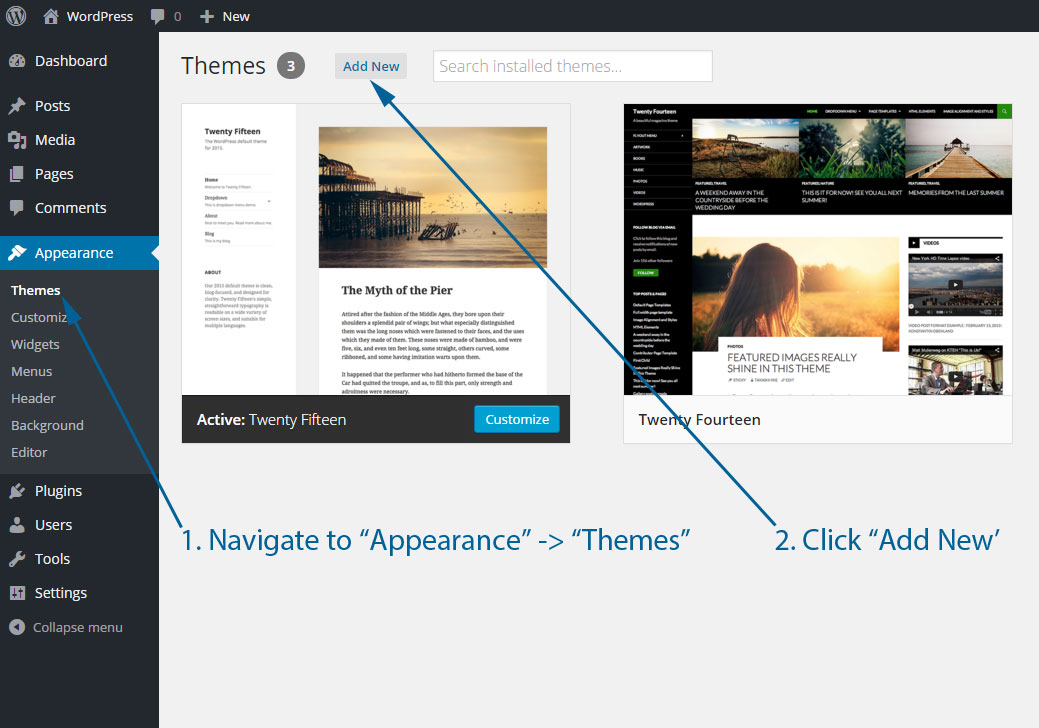
You can modify your theme by heading to the dashboard of your WordPress and clicking on Appearance » Themes.
On this screen, you are required to click on the Add New button.
On the next page, you can now search from the thousands of freely available WordPress themes accessible in the WordPress.org themes directory. You can sort by latest, featured, popular as well as other feature filters
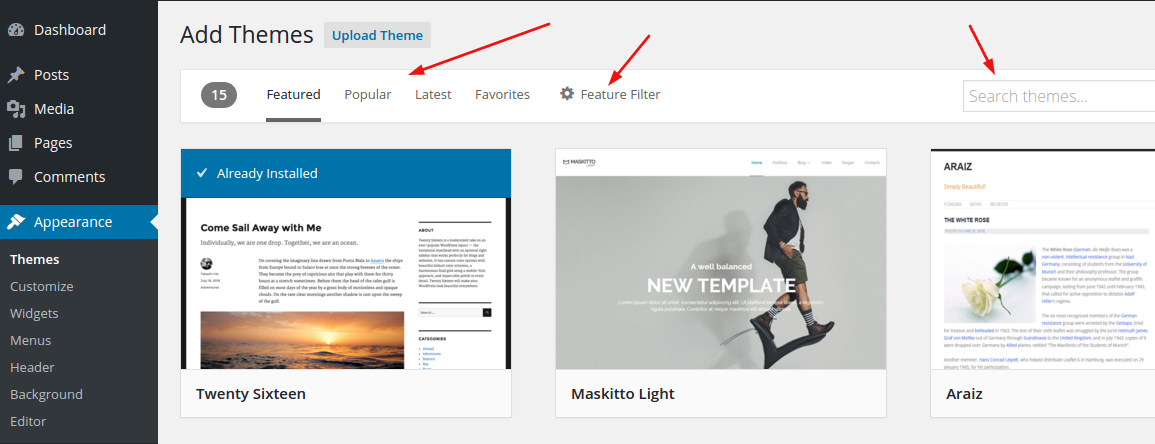
When you have finally found the theme which  you like, go ahead and install it. Do not close the screen or refresh the page until the theme is installed. Once installed, you will now see an Activate button.
Click on it in order to Install and activate the theme.

Once the installation of your theme is completed, you can now modify and customize it by clicking on the Customize link. You will find this under the Appearance menu.
Once you choose your WordPress theme, you are now prepared to create your very first wordpress blog post.
Step 4. Creating Your First Blog Post
To start writing your first blog post, click on Posts » Add New in your dashboard.
You will now be able to see an editor area. This is the place where you will start writing your first wordpress blog post.
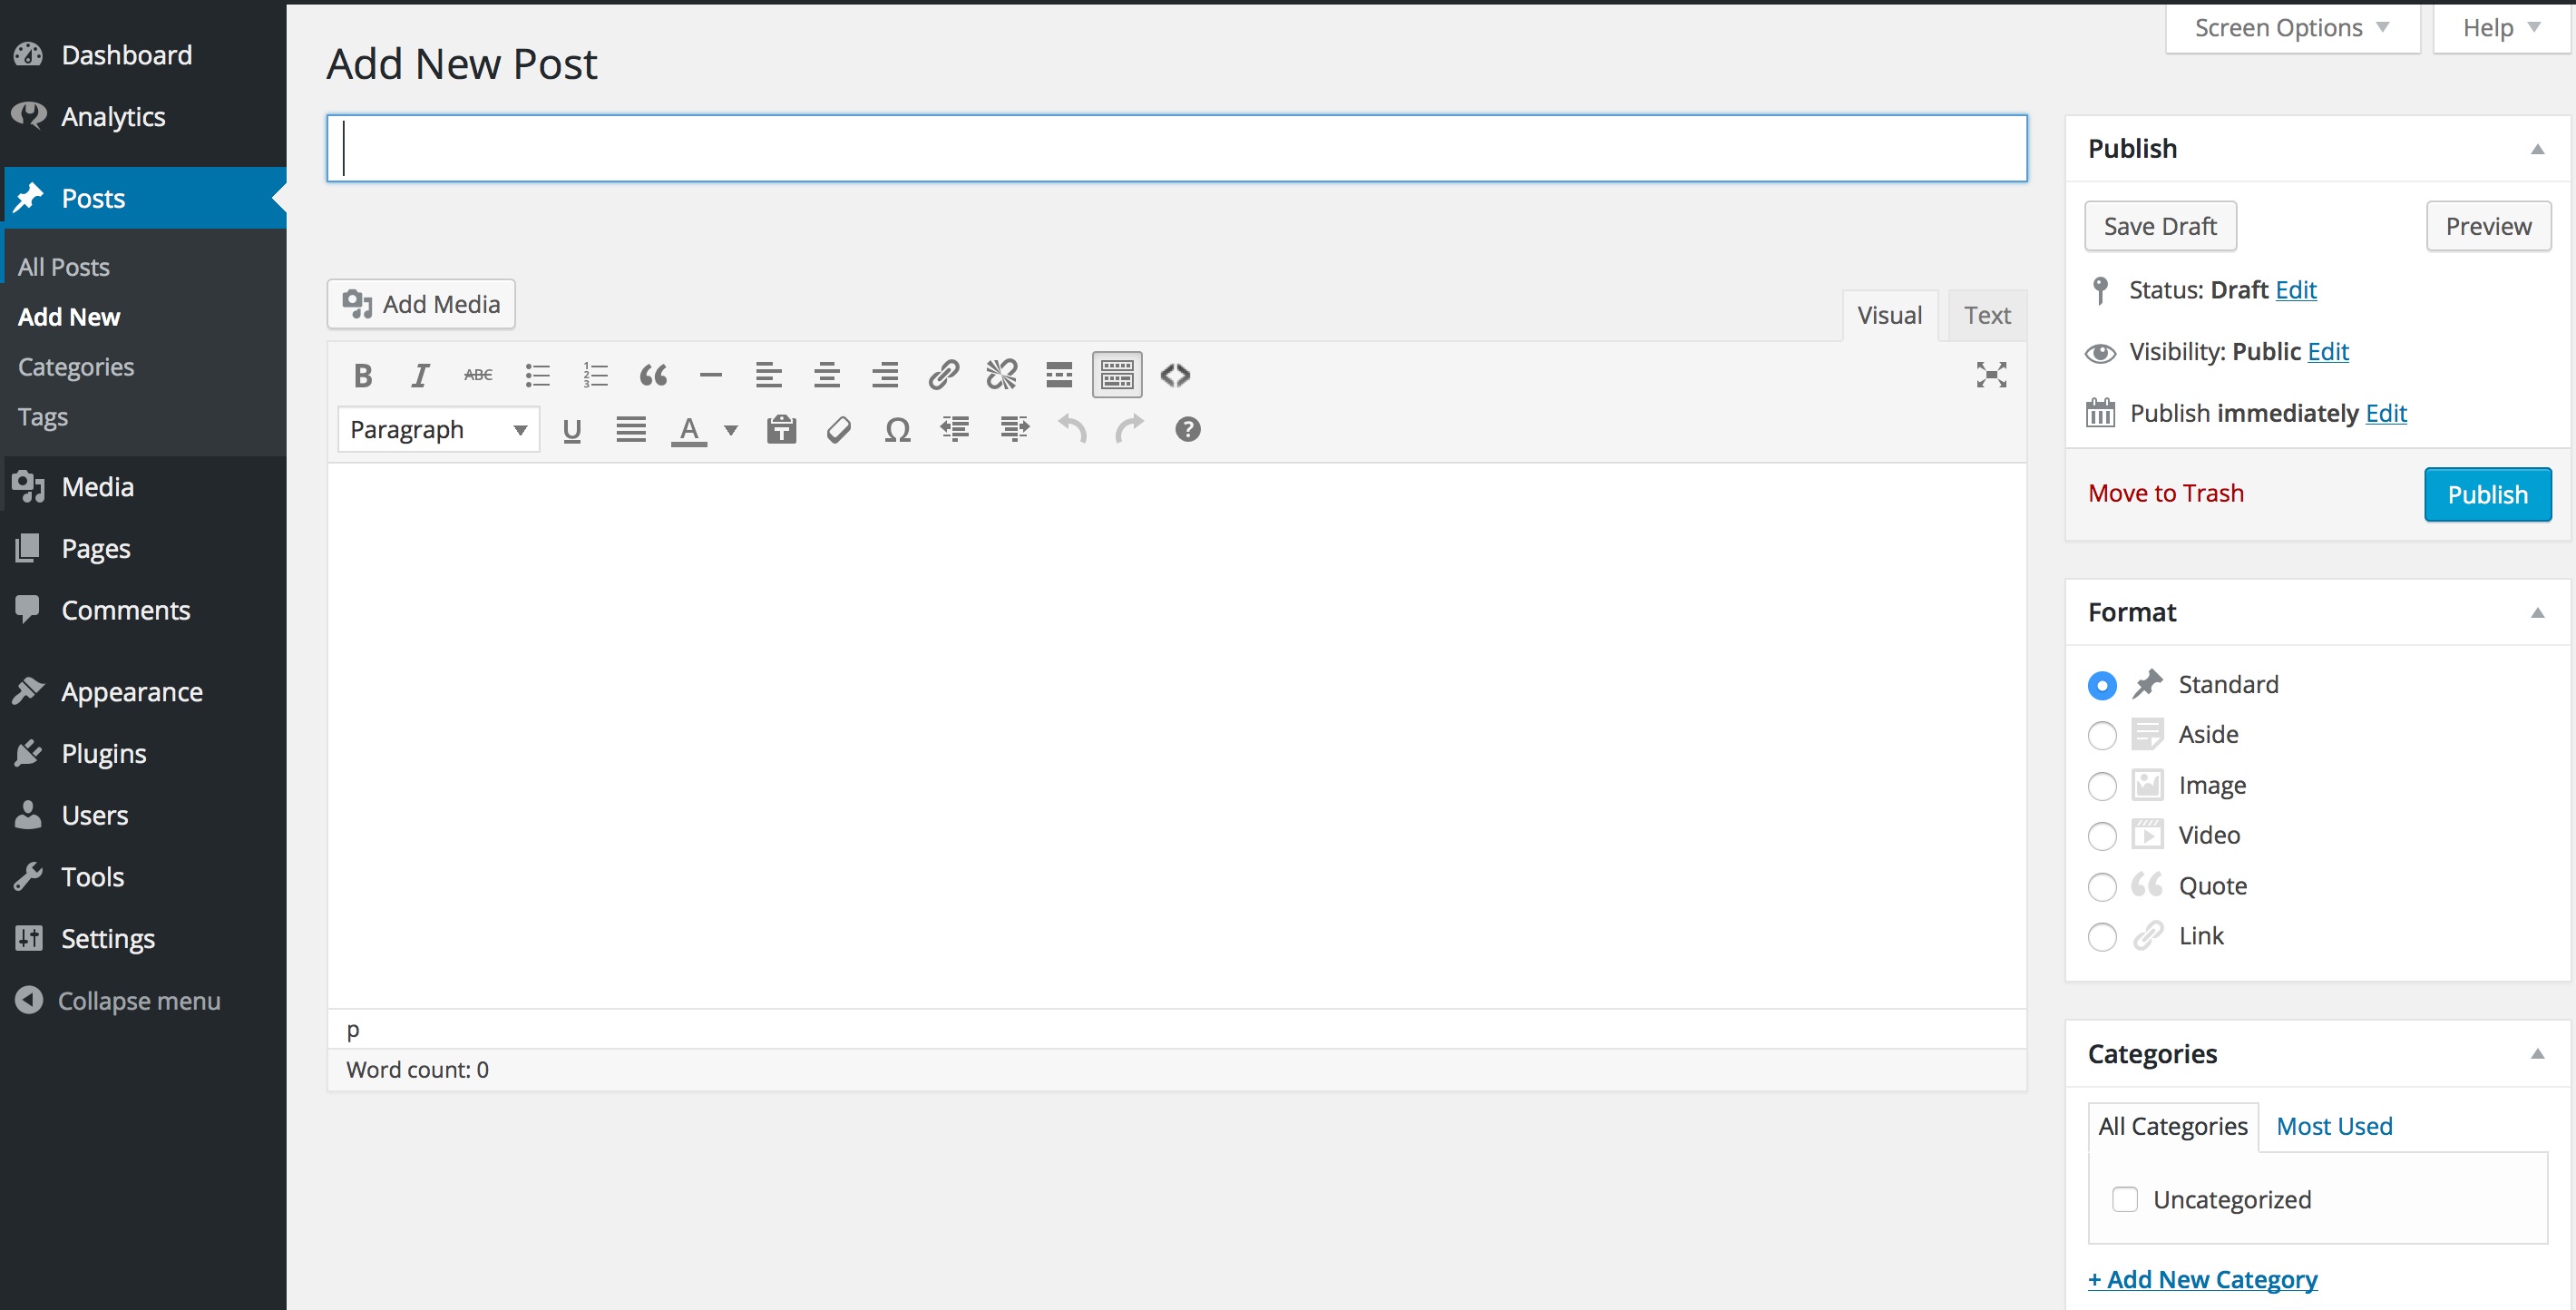
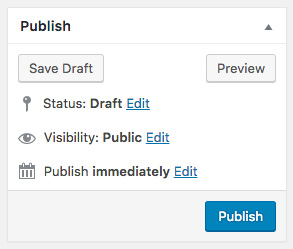
Once you’re done with writing the post, click on the Publish button You will find this button on the right side. Click to publish your first blog post.
On the posts page, you will also come across several other important sections such as Categories and Tags. You can utilize these to organize and systematize your wordpress blog posts.
Often newbie bloggers and small business owners with no technical knowledge are confused between pages and posts menu in the dashboard. Pages are generally reserved for static content (like About Us, Contact Us etc) and Posts are usually what makes up the blog aspect (especially if you are adding a blog to your corporate site.). Post are usually news or informational articles about a certain subject.
Step 5. Plugins & Customizations
Once you start a wordpress blog and have written and published your first blog post, you almost certainly want to get on track with adding other important elements on your blog / website like a contact us form, about us page, social sharing plugins and more
To further modify and customize WordPress and add features like galleries, social sharing, sliders, etc, you need to install WordPress plugins.
WordPress plugins are like apps that would allow users to add new features to the blog without having to code. There are over thousands of WordPress plugins available out there. Do your research and install plugins relevant for your blog.
Step 6. Monetizing your Blog
Now that you have created a wordpress blog and customized and modified it as per your liking, you are now looking to make money off / monetize your blog
There are in fact several diverse ways to effectively monetize your wordpress blog,. However, none of these methods will get you rich quickly. There is a lot of hard work and commitment required to achieve success
Never be deceived by the pictures of extravagant lifestyle, posh cars and pricey mansions because those are all phony.
Following are some of the ways to monetize after your start a wordpress blog
Advertising
- Ad Networks
- Sponsored Content
- Site wide sponsorships
- Job Boards
- Newsletter advertising
- Video and Podcast advertsing
- Competitions and Giveaways
Affiliate Marketing
- Affiliate Programs and Networks
- E-Commerce Shopping sites like Amazon etc
Services
- Freelancing services
- Consulting
- Training
- Speaking
- Copywriting
Products
- eBooks
- eCourses
- Reearch Reports
- Apps
- Softwares
Events
- Meetups / Conferences
- Webminars
- Workshops
Recurring Revenue
- Premium Content Access
- Coaching
As long as you put in the hard work and sweat it out, you’ll definitely reap the rewards. Always remember that there are no shortcuts.
In case you have any further questions with regards to how to start a wordpress blog, please feel free to get in touch with our support team
Frequently Asked Questions (FAQs)
Here are some common questions that we receive from users looking to create or start a wordpress blog
Is there a way to create a blog without having to use WordPress?
Yes, there are quite a few other platforms available for blogging. But when you compare wordpress with other platforms like Blogger, wix, Â tumblr, medium, squarespace, weebly etc, WordPress is by far the best platform out there in the market.
Can I create a blog without hosting?
No, that would not be possible. Web hosting is the place where your website files are uploaded and stored. All websites and self hosted blogs need web hosting.
How much does it cost to start a blog?
Check out the following plans for WordPress. For better perfromance, it is recommended to use a WordPress  Hosting Plan instead of a shared hosting plan
Serverfellows Shared Hosting Plans
Serverfellows WordPress Hosting Plans
Can I start a blog without my parents knowing about it?
Yes. You most definitely can start a WordPress blog and make it personal & private and hide the same from the internet.
Can I start a WordPress blog and make money with Google Adsense?
Yes, you can earn money and monetize your WordPress blog with Google AdSense.
How can I start a blog and remain anonymous?
Do ensure that your WHOIS privacy protection is on. We have shown in the article above how to purchase ID protection while checking out. This way you will have a blog that is public facing but your identity will not be revealed. Needless to say, avoid posting personal pictures and details on your wordpress blog
How do I add a podcast to my WordPress blog?
WordPress has a number of plugins that could be used to add podcasts. Just check out the wordpress plugin directory to find out different podcast plugins and install and activate the one that suits your requirements
Can I create a multi-author blog in WordPress?
Yes, you certainly can. WordPress as a platform provides a user role management system that can be used  for the creation of a multi-author blog.
We hope that you found our post on how to start a WordPress blog to be of great assistance. In case you have any more queries, please feel free to get in touch with us via email or the comments below